Tropical Leaf Garland
- May 29, 2017
- 5 min read
What do you get if you combine a tropical leaf, some coloured papers and the most advanced paper cutting machine around? A totally tropical paper garland, that's what!

And I am going to show you how, by using my Cricut Explore Air 2
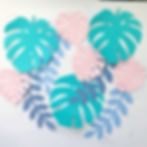
For this tropical leaf garland project, I am going to guide you through the very basics of how to use the Cricut. For those of you who are already a whizz on the Cricut can probably skip through the first part of the tutorial. So apologies if I'm teaching you pros to suck eggs!
YOU WILL NEED
Twine
PVA glue
Scissors
Washi tape for hanging
1 First things first, log onto your Cricut account. Or join if you haven't already!
Then click on CREATE NEW PROJECT. This will open this gridded screen...

2 Click on INSERT IMAGES. Then type into the the search box 'Monstera Leaf', this will bring up a large selection of various tropical leaf shapes to choose from. I chose the first one, top left.
3 Click on your chosen design, then click the green INSERT IMAGES button - bottom left of the screen

4 We will be working on one tropical leaf shape at a time, so go over to the panel on the right and start clicking the 'eye' icons so you are just left with the large leaf on the screen.

5 I didn't want the stalk to be so long, so here is a way to cut the stalk down.
Go to Insert Shapes and choose a square. Place the square over the part of the stalk you don't want anymore,

6 Then click Select All from the top (or drag a box around both the shapes),

7 Then click Slice from the right side panel. You can then separate the different pieces and delete them one by one, so you are left with a shorter stalk!

8 You can then re-size your tropical leaf to any dimension you like. Use the arrow icon in the corner of the square around the leaf to drag it bigger.
Alternatively if you want specific dimensions, you can go into the panel on the right and click Edit. In the Size box, you can unblock the padlock and put in the exact dimensions you want.
I made my leaves 8.01 x 8.72" as I wanted them quite large on the garland.

9 To make small holes in the tropical leaf, so you can thread a ribbon or twine through is very simple. It uses the exact same method as cutting the stalk down.
Simply Insert Shape and choose the circle. Re-size the circle to the width of the ribbon or twine you intend to thread through, then Select All, then Slice.
Drag the cut holes away and delete them

10 Once you are happy with the size, click the green Cricut GO button at the top of the screen.
This will take you through to a screen that have a green grid, it will show you the scale of the leaf you want to cut. You can go back a step if you want to resize it, by clicking on the X button, top right.

11 On the left hand panel you can then let the Cricut know what size paper you intend to use. As my tropical leaf is quite big I am using a 12 x 12" piece of card stock.
Then click GO
12 At this point your computer will search for your Cricut machine - make sure it's switched on - you can either find it via Bluetooth or plug in the USB cable.

13 Once your computer and the Cricut are linked, it's time to load!
Press your card stock down onto the sticky cutting mat, right into the top left hand corner, using the measurements as a guide. Make sure it's completely flat with no air pockets.
Turn the gauge on the Cricut to Cardstock
Slide the cutting mat into the guides on the Cricut machine. Then, holding it in place, press the flashing arrow button.

14 The Cricut will then spring into life, moving over the paper quickly with exact precision.
Once it is finished cutting the tropical leaf, the arrow button will flash again. Press the button and the mat will come sliding out.

15 Carefully peel away the paper from around the leaf - try bending the board so some of the shape pops up. You can use your Cricut tools to help lift up the edges of your leaf.
I made 4 tropical leaves of this size, all from jade green card stock.

16 I then moved onto a different shaped leaf, from my original 3.
I made this one smaller than the first big leaf. I made it 4.91 x 5.39" I added holes again for the twine.
17 When I pressed GO, to take me through to the screen with the mat, I changed the amount of Project Copies to 4. As the leaves were small enough to fit multiples on a sheet of 12 x 12" card stock.

18 Carefully peel away the tropical leaf shapes away from the cutting mat.
I cut 4 smaller leaves from pink card stock.
I rather like the negative space of this too! I might use the cut paper, layer it over some coloured card and frame it!

19 I decided to choose a different shaped leaf to add to my garland. This time I just typed in 'leaf' so I had hundred to choose from. I wanted something long, that would hang down lower than my large monstera leaves.

20 I eventually settled on this leaf shape. I had to trim the stalks and added tiny holes to them too.
I played around with the size of the leaf, so I could guarantee getting 2 cut from a piece of 12 x 12" card stock.

I cut 4 of this style leaf, 2 from mid blue and 2 from pale blue.

21 Once I had all of my leaves cut out, I lay them on the floor and had a play around with composition. I didn't want them to have a strict order to them.

22 I applied a little PVA glue to the tip of some twine, to stop it fraying. Once it was dry I started threading the leaves onto the twine in the order I had them lined up in.

23 Give the garland enough length so you can move them around, up and down the twine to space them out.
And, VOILA! Your Cricut tropical leaf garland is complete!
Hang the garland from trees in the garden for an alfresco party, in a child's bedroom, at a wedding or just use it decorate a dull room in the house! How very versatile.


If you liked that, then how about these to tickle your fancy....
You will be amazed at how easy it is to create beautifully marbled paper, just with a secret ingredient you can find in your home...
How pink and green should ALWAYS be seen!

The art of paper curling is SO much fun and very therapeutic. And, if you don't fancy creating a skull you can learn the simple technique and create your own wonderful designs.


